PanDev + GitLab: Complete Setup in 15 Minutes

Setting up a Git integration shouldn't take a sprint. With GitLab and PanDev Metrics, it takes about 15 minutes — then every commit, merge request, and pipeline event flows into your engineering dashboard automatically.
This guide covers both GitLab SaaS (gitlab.com) and self-managed instances. No plugins, no complex OAuth flows — just webhooks and a personal access token.
{/* truncate */}
What You'll Get
Once the integration is live, PanDev Metrics will track:
- Commits — who committed, when, what changed, and how many lines
- Merge Requests — time to open, review duration, merge cycle time
- MR Reviews — comments, approvals, change requests per reviewer
- Repository events — branch creation, tag pushes, pipeline triggers
All of this feeds into your DORA metrics, cycle time dashboards, and individual contributor profiles.
Prerequisites
Before you begin, make sure you have:
| Requirement | Details |
|---|---|
| GitLab account | Owner or Maintainer role on the projects you want to track |
| PanDev Metrics account | Admin or Manager role |
| Network access | Your GitLab instance must be able to reach PanDev's webhook endpoint (or your on-premise PanDev instance) |
Step 1: Generate a GitLab Personal Access Token
PanDev needs read access to your repositories and merge requests. A Personal Access Token (PAT) is the simplest way to grant this.
- In GitLab, go to User Settings → Access Tokens
- Click Add new token
- Configure the token:
Token name: pandev-metrics-integration
Expiration date: (set to 1 year or your security policy)
Scopes: ✅ read_api
         ✅ read_repository
- Click Create personal access token
- Copy the token immediately — you won't see it again
:::tip Group Access Tokens If you're connecting multiple projects under one group, consider using a Group Access Token instead. Go to Group → Settings → Access Tokens and follow the same steps. This avoids tying the integration to a specific user account. :::
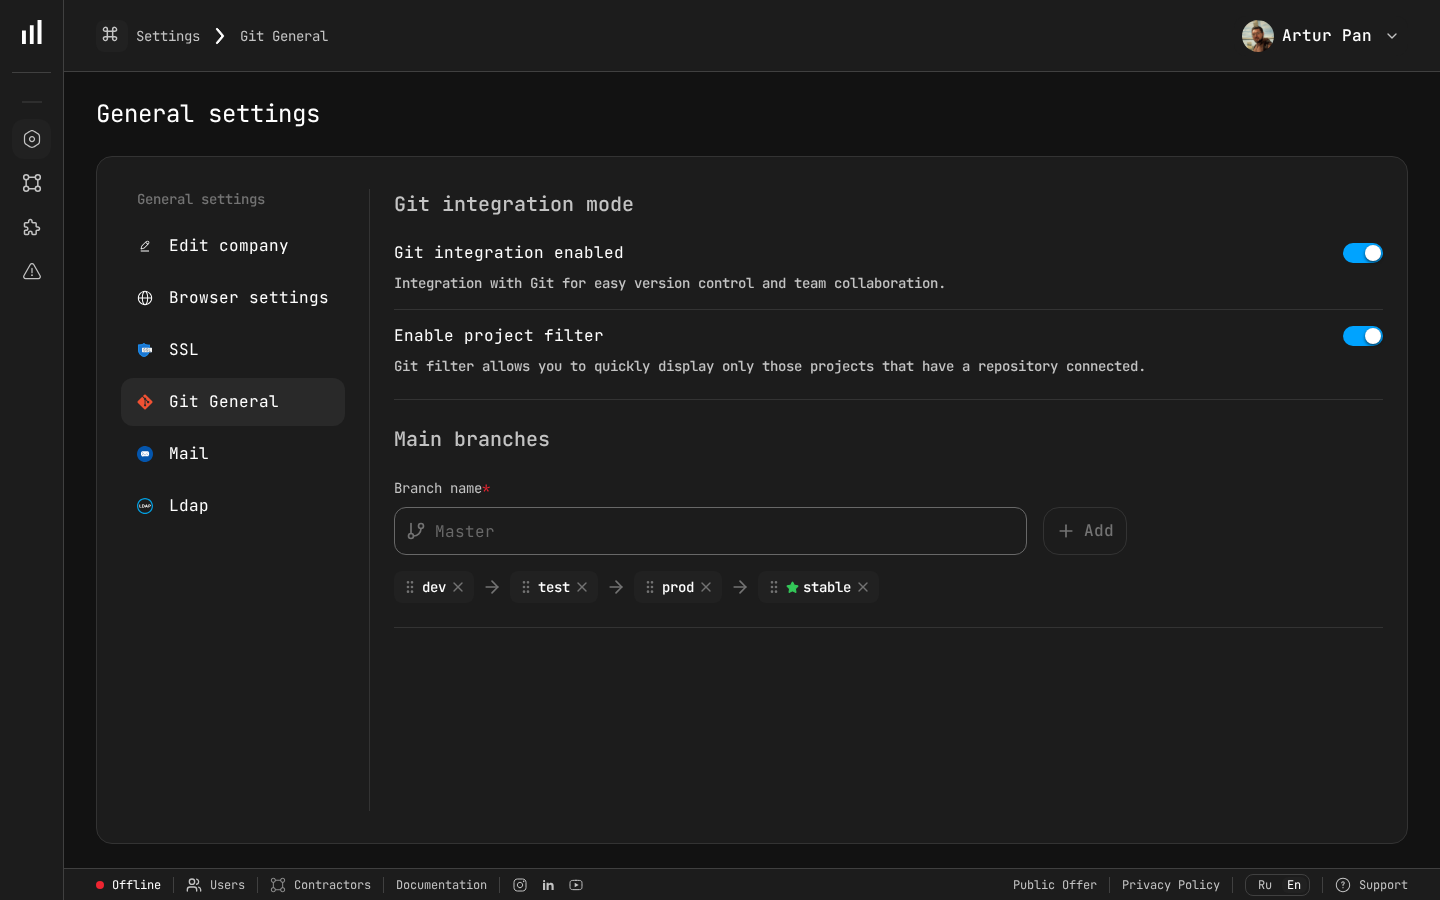 The Git General settings page lets you enable Git integration, configure project filtering, and define your main branch flow (dev, test, prod, stable).
Step 2: Add the Token to PanDev Metrics
- Log in to PanDev Metrics
- Navigate to Settings → Integrations → GitLab
- Click Add GitLab Connection
- Fill in the connection details:
GitLab URL: https://gitlab.com  (or your self-managed URL)
Access Token: glpat-xxxxxxxxxxxxxxxxxxxx
- Click Test Connection
You should see a green checkmark and a list of available groups and projects. If the test fails, double-check your token scopes and network connectivity.
Step 3: Select Projects to Track
After a successful connection, PanDev displays all projects your token can access.
- Use the search bar or browse the group tree
- Check the boxes next to projects you want to track
- Click Save Selection
:::note Large organizations If you have 50+ projects, you can select entire groups. PanDev will automatically pick up new projects added to that group later. :::
Step 4: Configure Webhooks
Webhooks are what make the integration real-time. Without them, PanDev would have to poll the GitLab API — slower and rate-limited.
PanDev can create webhooks automatically, but here's how to do it manually if your security policy requires it.
Automatic Setup (Recommended)
In the PanDev integration page, click Setup Webhooks Automatically. PanDev will create a webhook on each selected project with the correct URL and events.
Manual Setup
If you prefer to create webhooks yourself:
- In GitLab, go to your Project → Settings → Webhooks
- Click Add new webhook
- Configure:
URL: https://hooks.pandev-metrics.com/api/v1/gitlab/webhook
Secret token: (copy from PanDev Settings → Integrations → GitLab → Webhook Secret)

Trigger events:
  ✅ Push events
  ✅ Merge request events
  ✅ Comments
  ✅ Pipeline events (optional — for DORA deployment tracking)

SSL verification: ✅ Enable SSL verification
- Click Add webhook
- Test it by clicking the Test dropdown → Push events
You should see a 200 OK response. If you get a timeout, check your firewall rules.
Group-Level Webhooks (GitLab Premium)
GitLab Premium and Ultimate editions support group-level webhooks, which let you set up a single webhook for all projects in a group:
- Go to Group → Settings → Webhooks
- Use the same URL and secret as above
- This covers all current and future projects in the group
Step 5: Verify the Data Flow
Give it a minute, then check PanDev Metrics:
- Go to Dashboard → Activity Feed
- You should see recent commits and merge requests appearing
- Open any project in PanDev — the Commits and Merge Requests tabs should show data
If data isn't flowing:
| Symptom | Fix |
|---|---|
| No data at all | Check webhook delivery logs in GitLab (Project → Settings → Webhooks → Edit → Recent Deliveries) |
| Commits appear but no MRs | Ensure Merge request events is enabled in the webhook |
| 401 errors in webhook logs | Regenerate the webhook secret in PanDev and update it in GitLab |
| Timeout errors | Check if your firewall allows outbound traffic to hooks.pandev-metrics.com on port 443 |
Step 6: Map GitLab Users to PanDev Profiles
For accurate per-developer metrics, PanDev needs to know which GitLab user corresponds to which team member.
- Go to Settings → Team Management
- PanDev will show a list of detected GitLab usernames
- Map each username to the correct team member profile
- If a developer uses multiple email addresses for commits, add all aliases under their profile
This step is critical for:
- Accurate individual productivity metrics
- Correct cycle time attribution
- Cross-platform identity resolution (if the same person uses GitLab + Jira)
Step 7: Configure Metric Preferences (Optional)
Fine-tune what PanDev tracks:
Working Hours
Settings → Organization → Working Hours

Default: Mon-Fri, 09:00-18:00
Timezone: Auto-detected per user, or set organization default
Cycle time calculations use working hours by default. A merge request opened Friday at 17:00 and merged Monday at 10:00 counts as 1 working hour, not 65 calendar hours.
Excluded Paths
Filter out noise from auto-generated files:
Settings → Projects → [Your Project] → Excluded Paths

Examples:
  - package-lock.json
  - yarn.lock
  - *.generated.ts
  - vendor/**
  - dist/**
Branch Filters
Track only branches that matter:
Settings → Projects → [Your Project] → Branch Filters

Include: main, master, develop, release/*, feature/*
Exclude: dependabot/*, renovate/*
What Your Dashboard Looks Like After Setup
Within 24 hours of setup (or less, if your team is active), you'll see:
- Cycle Time breakdown — from first commit to merge, split by coding, review, and waiting time
- MR Throughput — how many merge requests ship per day/week
- Review Load — who reviews the most, and how fast
- Commit Patterns — when your team is most active
- DORA Metrics — deployment frequency, lead time, MTTR, and change failure rate (requires pipeline webhooks)
Troubleshooting
"Token expired" error after a few months
GitLab PATs have expiration dates. Set a calendar reminder to rotate the token before it expires. Update it in PanDev → Settings → Integrations → GitLab → Edit Connection.
Self-managed GitLab behind a VPN
Two options:
- Allow-list PanDev's IP range — contact support@pandev-metrics.com for the current IP list
- Deploy PanDev on-premise — run PanDev inside your network via Docker or Kubernetes (see our on-premise deployment guide)
Webhook delivery failures after GitLab upgrade
After major GitLab upgrades, webhook signing may change. Re-test your webhooks and regenerate the secret if needed.
"As a CTO and for our tech leads, it's important to see not individual employees but the state of the development process: where it's efficient and where it breaks down. The product allows natively collecting metrics right from the IDE, without feeling controlled or surveilled. Implementation was very simple." — Maksim Popov, CTO ABR Tech (Forbes Kazakhstan, April 2026)
Next Steps
Your GitLab integration is live. Here's what to do next:
- Add IDE plugins — install the VS Code or JetBrains plugin for coding time tracking
- Connect Jira or ClickUp — link coding activity to tasks and sprints
- Set up team dashboards — create views for each team lead
- Enable the AI assistant — ask questions like "What was our average cycle time last sprint?"
Ready to connect GitLab? Start with PanDev Metrics — setup takes 15 minutes, and the first insights arrive within hours.