Cloud quick start
TL;DR. Sign up at workspace.pandev.io, create a company workspace, connect Git and (optionally) a task tracker, invite employees, install IDE plugins, and you will see live metrics in 15–20 minutes. This guide is written for the person setting up the workspace for the rest of the team — typically an engineering lead or admin.
Before you begin
- A work email — or a Google account if you want to use Google sign-in.
- Admin access to one Git provider (GitHub, GitLab, Bitbucket, or Azure DevOps).
- Optional: admin access to one task tracker (Jira, Yandex Tracker, ClickUp, or Azure Boards).
- 15–20 minutes for the initial setup.
You can start with Git only and add a task tracker later. Metrics show up faster that way.
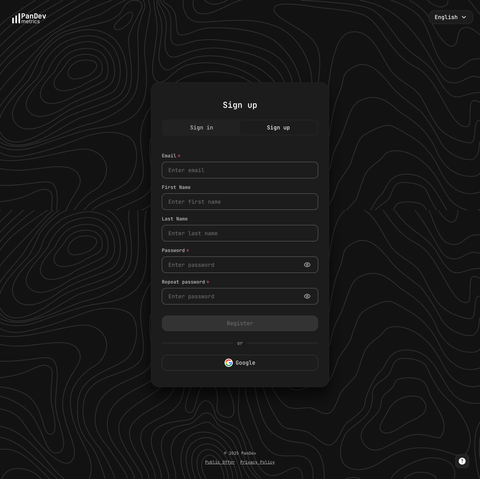
1. Register your account
Open workspace.pandev.io and either sign up with email or continue with Google. Confirm your email and sign in.
2. Create your company workspace
Use the workspace switcher in the top-left corner and select Create company. Enter the company name and a unique login (used in invites and URLs). One Google or email account can own several company workspaces — Cloud is multi-tenant by design.
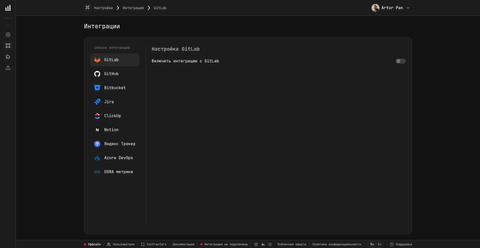
3. Connect a Git integration
Open Settings → Integrations and connect your Git provider. PanDev Metrics ingests commits, pull/merge requests, releases, and merge events into production branches.
Supported providers:
- GitHub (App or OAuth — App is the recommended path)
- GitLab Cloud and Self-Managed
- Bitbucket Cloud, Server, and Data Center
- Azure DevOps (Repos)
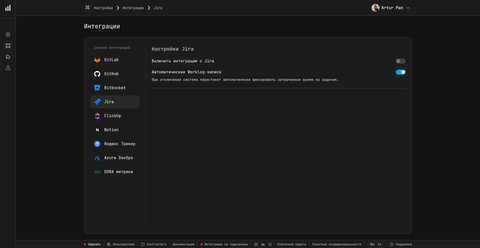
4. Connect a task tracker (optional)
Go back to Settings → Integrations and pick a tracker. Connecting one ties your tickets, transitions, and worklogs to the Git and IDE timelines — this is what makes "real cost per feature" possible.
Supported trackers:
- Jira Cloud and Server / Data Center (admin permissions required, because PanDev Metrics installs webhooks)
- Yandex Tracker
- ClickUp
- Azure Boards
5. Set up the organisation
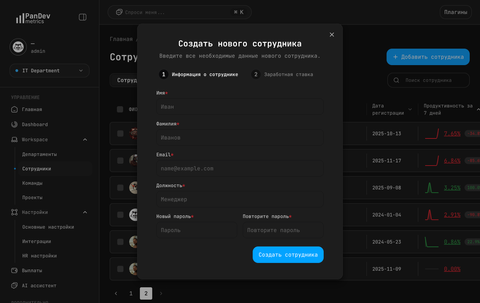
Open Organization → Employees and invite teammates by email.
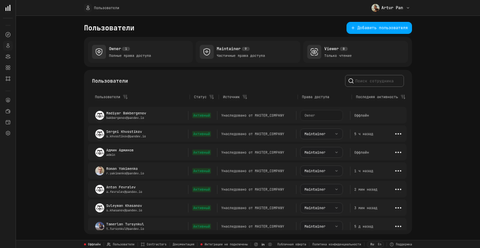
:::info Two-step role assignment Invites are sent without a role. After an employee accepts, open their profile and grant Admin, Maintainer, or Viewer. This is intentional — it lets you onboard people quickly and pin down permissions later. :::
When you grow past a single team, group employees into departments and teams in Organization → Departments and Organization → Teams.

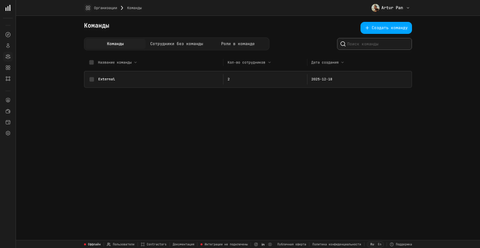
:::tip Archive, not delete PanDev Metrics never hard-deletes employees, departments, or teams — the button labelled Delete in the UI actually archives the record. Historical metrics stay intact. :::
6. Install IDE plugins
IDE plugins are where the unique IDE-level telemetry comes from. Open Settings → Plugins for ready-made install instructions for every supported IDE.
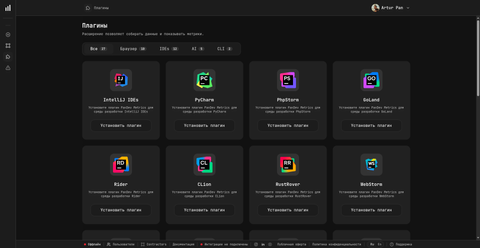
Supported IDEs (all 10 JetBrains apps, plus the rest):
- JetBrains: IntelliJ IDEA, PyCharm, WebStorm, PhpStorm, GoLand, Rider, CLion, RustRover, RubyMine, Android Studio
- Visual Studio (all versions)
- VS Code and forks (Cursor, Windsurf, etc.)
- Xcode
- Eclipse and Eclipse-based IDEs
Connection settings for every plugin:
- Server URL:
https://metrics-cloud.pandev.io - Company login: your workspace login from step 2
- Employee login / password: the invited employee's credentials
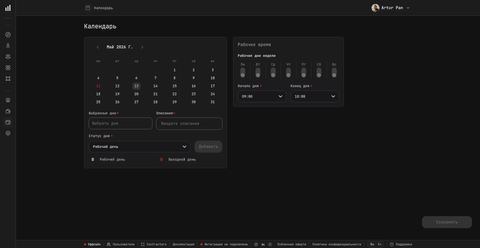
7. Configure working hours
PanDev Metrics needs a working calendar to compute overtime correctly. Overtime in PanDev means any work outside business hours on a weekday.
Open Settings → Calendar and set the company schedule. Individual employees can override their schedule on their profile — the personal schedule wins when they conflict.
Verify
You are done when all of the following are true:
- You can sign in at workspace.pandev.io and see your company in the workspace switcher
- Settings → Integrations shows at least one Git provider with a green status
- At least one employee has an assigned role (Admin / Maintainer / Viewer)
- One IDE plugin is installed and pointing at
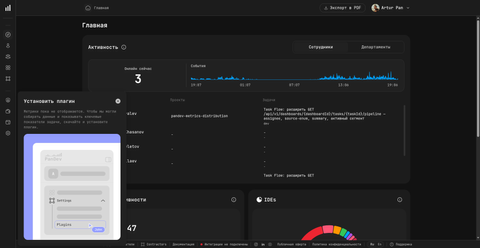
metrics-cloud.pandev.io - The Dashboard shows at least one data point within an hour of plugin install

FAQ
How long until I see my first metric?
Plugins send their first heartbeat within a minute of install. Git history is backfilled within 5–30 minutes depending on repository size. DORA metrics are recomputed in the nightly cron at 02:30 UTC — they show up the next day.
Can I invite someone with a specific role straight away?
No. PanDev Metrics deliberately splits invites and role assignment into two steps. Invite first, assign Admin, Maintainer, or Viewer afterwards from the employee's profile.
Does PanDev Metrics read my source code?
No. IDE plugins only record events — file names, scrolls, opens, closes, AI prompts. The contents of the files never leave your machine.
Can the same Google account own several companies?
Yes. Cloud is multi-tenant — one account can own and switch between multiple company workspaces. On-prem is single-tenant by design.
Next steps
- Install the JetBrains plugin — detailed plugin setup
- Connect your Git provider — per-provider guides
- Set up a task tracker — Jira, Yandex Tracker, ClickUp, Azure Boards
Related
- Concept: Product overview — what every PanDev Metrics tenant includes
- Reference: On-prem quick start — same product, your servers