Install on Linux
Install the PanDev Metrics CLI plugin on Linux in about 3 minutes. After this guide your terminal activity (base command + timestamp) shows up in PanDev Metrics dashboards.
Before you begin
-
A Linux distribution with Homebrew on Linux installed (docs.brew.sh/Homebrew-on-Linux)
-
Your PanDev Metrics API token — open the web app, go to Settings → Plugins → CLI, and copy the value from the Enter your token step. Tokens start with
pandev_.The token already carries the server address and the workspace, so there is no separate Server URL to enter.
If you cannot install Homebrew, ask your administrator for the standalone binary build of the CLI plugin.
Step 1 — Install the plugin
curl -fsSL https://raw.githubusercontent.com/pandev-metriks/pandev-cli/main/install.sh | bash
On Linux, the installer registers the daemon automatically — no sudo step needed.

Step 2 — Authenticate
pandev login
# Enter your PanDev token (starts with 'pandev_'):
Paste the token at the prompt. To skip the prompt — in a provisioning script, for example — pass it as a flag:
pandev login -t pandev_...
--token pandev_... and --token=pandev_... do the same thing.
A token is a credential — anyone holding it can send metrics as you. Keep it out of commits and shared chats, and prefer the interactive prompt on a shared machine so the token does not land in your shell history.
If you are already signed in, the command replaces the stored credentials.
Credentials are stored locally so the daemon reconnects automatically after restarts.
Step 3 — Verify
Confirm that the daemon is running and authenticated:
pandev status
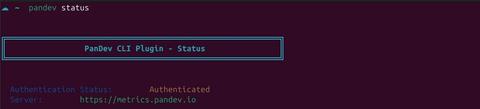
Check that heartbeats are accumulating:
pandev time
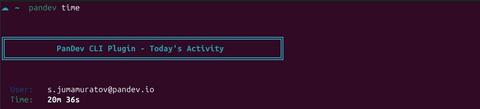
You can also open Settings → Plugin → CLI plugin in the PanDev Metrics UI — your machine should appear with a recent heartbeat timestamp.
Useful commands
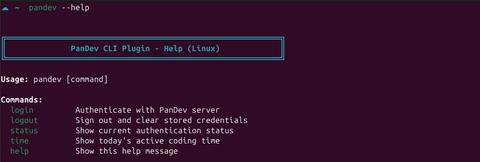
pandev --help     # List every command the plugin exposes
pandev status     # Daemon health and auth state
pandev time       # CLI activity captured today
pandev login      # Re-authenticate
Update
brew update && brew upgrade pandev-cli-plugin

Uninstall
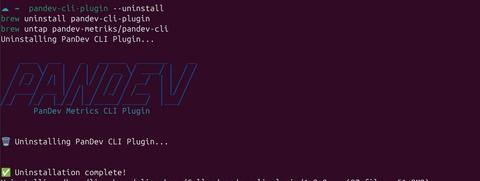
pandev-cli-plugin --uninstall
brew uninstall pandev-cli-plugin
brew untap pandev-metriks/pandev-cli
Troubleshooting
pandev: command not found after installation
The Homebrew prefix may not be on your PATH. Add it to your shell init file:
echo 'eval "$(/home/linuxbrew/.linuxbrew/bin/brew shellenv)"' >> ~/.bashrc
exec bash -l
pandev status shows the daemon as not running
Restart the brew services or your terminal session, then re-run pandev login. If the issue persists, check journalctl --user -xe for daemon errors.
Self-signed certificate on on-prem server
Add your organisation's root CA to the system trust store:
# Debian / Ubuntu
sudo cp company-ca.crt /usr/local/share/ca-certificates/
sudo update-ca-certificates

# Fedora / RHEL
sudo cp company-ca.crt /etc/pki/ca-trust/source/anchors/
sudo update-ca-trust
No data in the dashboard after 30 minutes
Confirm three things:
pandev statusreports authenticated and runningpandev timeshows a non-zero value- The token you signed in with belongs to the same account and workspace you are viewing in the PanDev Metrics UI
FAQ
Which distributions are supported?
Any distribution where Homebrew on Linux runs — Ubuntu, Debian, Fedora, RHEL, Arch, openSUSE, and others. The plugin itself is a standard 64-bit Linux binary.
Do I need root / sudo?
No. The daemon runs as your user; Homebrew on Linux does not require root for the install.
What shells are supported?
bash, zsh, and fish. The plugin hooks into the shell on installation.
How do I switch to a different server or workspace?
Copy a token from the target workspace in the web app and run pandev login -t <NEW_TOKEN>. The server address is inside the token, so there is nothing else to change.
Related
- CLI plugin overview — what's captured, privacy model
- Install on macOS
- Install on Windows
- Browser extensions overview